
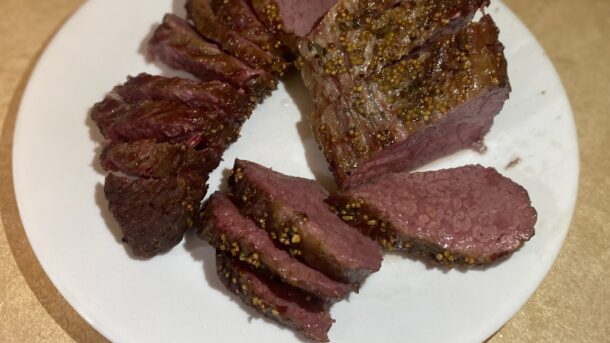
Have you ever bought a Corned Beef Brisket from the store and wondered if you can cook it in the oven instead of on the stove? Well, you can and the flavor is so much better! When you cook Corned Beef Brisket in the Oven, the meat gets a crispy coating and is still SO tender.
What type of beef brisket are you looking for?
- Point Brisket: Because of its higher fat content, the point brisket is well-suited for slow cooking methods such as smoking or braising. It benefits from long, slow cooking to render the fat and break down the collagen, resulting in tender, flavorful meat.
- Flat Brisket: The flat brisket is often used for dishes like corned beef or sliced for barbecue. It can be cooked using methods such as smoking, braising, roasting, or even sous vide to ensure tenderness.
So the Flat Brisket is better for this dish, but since I waited too long to purchase one before St. Patrick’s day, we’re going to be using a Point Brisket today 🍀🌈🍺
Try it with a side of Irish Colcannon.
A few things to remember…
- Rinse the corned beef brisket under cold water to remove any excess brine or seasonings from the packaging. Pat it dry with paper towels.
- Trim the fat cap to about 1 inch thick. You don’t want too much fat, but leaving some adds to the flavor.
- Place the brisket, fat side up, on a rack in a roasting pan or baking dish that’s large enough to accommodate it comfortably.
- Pour enough water to reach the bottom of the brisket. You don’t want too much because that will cause a “boiled” flavor and that’s what we’re trying to get away from.
- Rest the brisket for about 15-20 minutes before slicing so that the juices will reincorporate into the meat.
- Slice the brisket against the grain into 1/8 to 1/4 inch slices.
- Store in the refrigerator for 3 to 4 days or freeze up to 3 months.
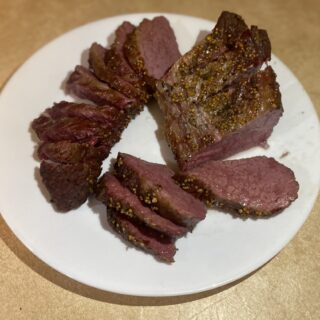
Corned Beef Brisket in the Oven
Corned Beef Brisket in the Oven is tender, flavorful, and perfect for celebrating St. Patrick's Day or any time you're craving a comforting meal.
Equipment
- Roasting pan with rack
Ingredients
- 6 lb. Corned Beef Brisket with Seasoning Packet
- water
Instructions
- Preheat the oven to 325F. Put a grate (roasting rack) in the bottom of a roasting pan or baking dish large enough to hold the meat.
- Rinse the corned beef to remove packing. Pat it dry with a paper towel.
- Trim the fat cap and place meat fat side up on roasting rack. Fill the bottom of the pan with enough water to reach the rack. Be careful NOT to submerge the meat in the liquid.
- Cover the pan with a lid or aluminum foil. Bake the meat covered for 2 hours. Remove the lid and roast for an additional 1 hour or until an internal temperature of 185F is reached.
- Remove from the oven and allow meat to rest for 15-20 minutes. Slice and serve.