Cakes and Desserts

The Easiest Boston Cream Pie

Boston Cream Pie Close Up


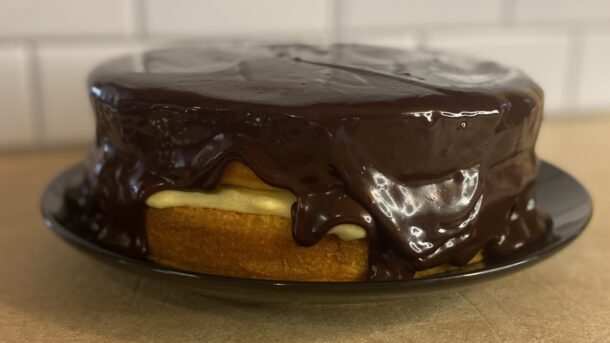
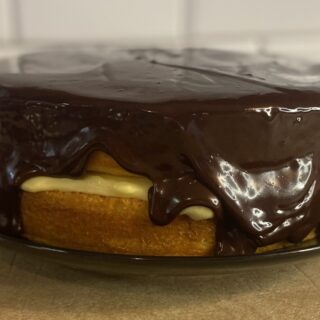
Picture layers of delicate sponge cake, moist and tender, gently embracing a velvety pool of rich vanilla custard. Crowned atop this masterpiece is a decadent cloak of glossy chocolate ganache, its deep cocoa notes dancing harmoniously with the delicate sweetness of the custard and the subtle vanilla undertones of the cake. This is the Boston cream pie!

The Boston cream pie has a rich history dating back to the mid-19th century. The Boston cream pie is credited to the Parker House Hotel (now known as the Omni Parker House) in Boston. It is said to have been created by French chef M. Sanzian at the Parker House Hotel in 1856. The original version was more like a sponge cake filled with custard and topped with a chocolate glaze. The cake gained popularity and became a signature dessert of the hotel. For more information on the start of this culinary classic, you can visit the Omni Hotel’s Blog.

A few tips you’ll want to follow when making this delicious creation…

  1. Use High-Quality Ingredients: Since Boston Cream Pie has relatively few components, each ingredient’s quality makes a big difference. Opt for high-quality butter, eggs, flour, chocolate, and vanilla extract.
  2. Allow the Cake to Cool Completely: After baking, let the cake layers cool completely in the pans before removing them. This helps the cake set and prevents it from crumbling when assembling the pie.
  3. Prepare the Pastry Cream in Advance: Pastry cream needs time to chill and set properly. Prepare it ahead of time and allow it to cool in the refrigerator for at least a few hours, or ideally overnight, before assembling the pie.
  4. Make a Smooth Chocolate Ganache: Use good quality chocolate for the ganache and heat the cream just until it starts to simmer before pouring it over the chocolate. Stir until smooth and glossy, then pour it over the assembled cake, allowing it to drip down the sides.
  5. Chill Before Serving: Refrigerate the Boston Cream Pie for at least an hour before serving to allow the ganache to set and the flavors to meld together. This also makes it easier to slice cleanly. Remove the pie from the refrigerator about 20-30 minutes before serving to allow it to come to room temperature slightly.
  6. Temper the Eggs: This is a crucial step in making the pastry cream. By tempering the eggs, you’re going to prevent curdling and ensure your cream has a smooth texture. If you’re a little intimidated by this step, Food Network has a great tutorial here.

With these tips in mind, you’ll be well-equipped to create a delicious Boston Cream Pie that’s sure to impress your family and friends. Enjoy!

Want an even easier dessert? Try Better Boxed Brownies or No-Bake Peanut Butter Cocoa Cookies.

Boston Cream Pie Close Up

The Easiest Boston Cream Pie

A delicious cake filled with creamy custard and topped with chocolate. It's made of soft sponge cake layers with a sweet, creamy center. On top, there's a smooth layer of chocolate ganache that adds a rich and indulgent touch!
Prep Time 15 minutes
Cook Time 25 minutes
Total Time 40 minutes
Course Dessert
Servings 8

Ingredients
  

For the Cake

  • 1 cup all-purpose flour
  • 1 tsp baking powder
  • ¼ tsp salt
  • 4 large eggs, separated
  • 1 cup granulated sugar
  • ½ cup whole milk
  • 1 tsp vanilla extract

For the Pastry Cream

  • 2 cups whole milk
  • 6 large egg yolks
  • ½ cup granulated sugar
  • ¼ cup cornstarch
  • 1 tsp vanilla extract

For the Chocolate Ganache

  • 4 ounces semisweet chocolate (chopped or chips)
  • ½ cup heavy cream

Instructions
 

Ready, set, go!

  • Preheat your oven to 350F. Grease and flour two 9-inch round cake pans.

Make the Cake

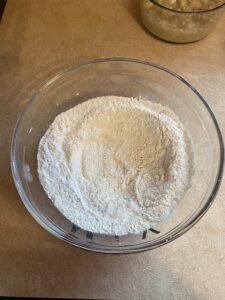
  • In a medium bowl, sift together the flour, baking powder, and salt. Set aside.
  • In a large mixing bowl, beat the egg yolks with 3/4 cup of sugar until thick and pale.
  • Gradually add the milk and vanilla extract to the egg yolk mixture, beating until well combined.
  • Gently fold the flour mixture into the egg yolk mixture until just combined.
  • In a separate clean mixing bowl, beat the egg whites until soft peaks form. Gradually add the remaining 1/4 cup of sugar and continue beating until stiff peaks form.
  • Fold the beaten egg whites into the cake batter until evenly incorporated.
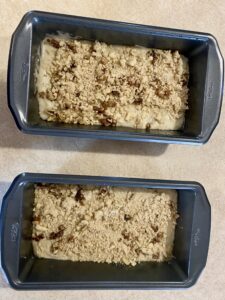
  • Divide the batter evenly between the prepared cake pans and smooth the tops.
  • Bake in the preheated oven for 20-25 minutes or until the cakes are golden brown and spring back when lightly touched.
  • Remove from the oven and let the cakes cool in the pans for 10 minutes before transferring them to wire racks to cool completely.

Make the Pastry Cream

  • In a medium saucepan, heat the milk over medium heat until it just begins to simmer. Remove from heat.
  • In a separate mixing bowl, whisk together the egg yolks, sugar, and cornstarch until well combined.
  • Gradually whisk the hot milk into the egg yolk mixture to temper the eggs. (For help with tempering eggs, see tip #6 in above post.)
  • Return the mixture to the saucepan and cook over medium heat, whisking constantly, until thickened.
  • Remove from heat and stir in the vanilla extract.
  • Transfer the pastry cream to a bowl, cover with plastic wrap (making sure the wrap touches the surface of the cream to prevent a skin from forming), and refrigerate until chilled and set, about 2 hours.

Make the Chocolate Ganache

  • Place the chopped chocolate or chocolate chips in a heatproof bowl.
  • In a small saucepan, heat the heavy cream over medium heat until it just begins to simmer.
  • Pour the hot cream over the chopped chocolate and let it sit for a minute.
  • Stir the mixture until the chocolate is completely melted and smooth. Set aside to cool slightly.

Assemble the Boston Cream Pie

  • Place one cooled cake layer on a serving plate.
  • Spread the chilled pastry cream evenly over the top of the cake layer.
  • Place the second cake layer on top of the pastry cream.
  • Pour the chocolate ganache over the top of the cake, allowing it to drip down the sides.
  • Refrigerate the assembled Boston Cream Pie for at least 1 hour to allow the ganache to set.
  • Slice and serve chilled. Pat yourself on the back because you've created a masterpiece!
Keyword Boston Cream Pie, cakes, dessert

Better Boxed Brownies

Brownies arranged on plate

Everyone loves a good brownie! But…not everyone likes to take the time to make them completely from scratch…myself included. We’d all like to know how to make Better Boxed Brownies! And with a few tricks, it’s easy to take any box of brownie mix to the next level. And the best part is no one will be able to tell.

  1. Use milk instead of water. The milk will help to make the brownies more richer and flavorful. Use can milk, buttermilk, or coconut milk for incredible results.
  2. Use melted butter instead of vegetable oil. Butter meaning real butter…not butter spread or margarine.
  3. Use instant coffee. Adding some instant coffee crystals will help to enhance the chocolate flavor in the brownies.
  4. Add some vanilla. Because why not?!? A splash of vanilla makes everything better.
  5. Use a muffin pan. Making brownies in a muffin pan ensures everyone gets an edge piece. Just use cupcake liners and spray with cooking spray.

Ready for another easy dessert? Try these No-Bake Peanut Butter Cocoa Cookies.

Brownies

Better Boxed Brownies

Take boxed brownie mix to the next level.
Prep Time 10 minutes
Cook Time 20 minutes
Course Dessert
Servings 12

Ingredients
  

  • 1 box brownie mix (usually between 16 to 17oz packages)
  • 2 TBS milk
  • 2 eggs
  • ½ cup melted butter
  • 1 TBS instant coffee
  • 1 TBS vanilla extract

Instructions
 

  • Preheat oven to 350F and prepare pan by greasing bottom and sides. If making cupcakes, spray cupcake liners with cooking spray.
  • In a large bowl, combine brownie mix, eggs, milk, melted butter, coffee crystals, and vanilla. Stir just until moist.
  • Pour into prepared pan and bake according to box directions. For cupcakes, bake at 350F for about 20-25 minutes.
Keyword brownies, dessert

Double Layer Pumpkin Pie

Slice of Double Layer Pumpkin Pie on a Plate

This double layer pumpkin pie is a no-bake classic from Keebler. It’s a combination of creamy cheesecake with the holiday taste of pumpkin.

The original recipe, found here from Keebler.com, calls for one pie crust. I’ve personally always made it into two pies to not only make it go further, but to make it be thinner so it’s easier to serve.

Important things to remember…

When you’re layering the pies, be sure to spread the cream cheese layer and then chill or freeze for at least 30 minutes to avoid the layers becoming mixed together. You want it to be pretty thick before you spread the pumpkin layer. It’s also helpful to chill the pie crust before you start just to make sure it doesn’t try to crumble on you when assembling.

As far as the spices for the pumpkin layer, you can substitute the 2 teaspoons of pumpkin pie spice for 1 teaspoon ground cinnamon, 1/2 teaspoon ground ginger, and 1/4 teaspoon ground cloves.

You can create your own 9-inch pie crust by combining 1 1/2 cups graham cracker crumbs (finely ground) with 1/3 white sugar and 6 tablespoons unsalted butter (melted.)

Ready for another Fall inspired dessert? Try The Best Banana Bread.

Slice of Double Layer Pumpkin Pie on a Plate

Double Layer Pumpkin Pie

A layer of cheesecake and pumpkin on a graham cracker crust. For thicker layers, use one pie crust.
Prep Time 15 minutes
Total Time 4 hours 15 minutes
Course Dessert
Servings 8

Ingredients
  

  • 1 Keebler Ready Crust Graham Pie Crust
  • 4 oz cream cheese, softened
  • 1 tbsp milk (cheesecake layer)
  • 1 ½ cups cold milk (pumpkin layer)
  • 1 tbsp white sugar
  • ¾ cup non-dairy whipped topping, thawed (from the freezer section, such as Cool-Whip)
  • 2 packages vanilla flavor instant pudding and pie filling (4 serving size)
  • 2 tsp pumpkin pie spice
  • 1 15oz can pureed pumpkin

Instructions
 

  • In a medium bowl whisk cream cheese, 1 tablespoon milk, and sugar. Gently stir in whipped topping. Carefully spread into crust. Chill before adding next layer.
  • In a large bowl beat 3/4 cup of milk, pudding mix, and spice with wire whisk for 1 minute. Whisk in pumpkin. Carefully spread over cream cheese layer.
  • Refrigerate at least 4 hours or until set.
  • Garnish as desired and store in the refrigerator.
Keyword dessert, pumpkin pie

$5 Milkshake Recipe

Today, we are paying tribute to one of the best movies of the ’90’s…Pulp Fiction!! It’s actually my favorite movie right up there with Forrest Gump and Dazed and Confused. Because for me, it’s all about that soundtrack, baby!!

I’m not gonna go through the whole movie, but I will tell you that the plot consists of four different tales that are seemingly unrelated, but ultimately entwined together. I will warn you that it is non-linear, so if you are like me, you may have to watch it more than once to really get it. One of the most iconic scenes is the dinner date between Vincent and Mia. It is there in that ’50’s retro diner that pop culture history was made.

Trust me! Just go watch it…

This recipe is only two ingredients…just milk and ice cream.  Simple, right?  I’ve compiled a few tips to help you get the perfect milkshake.

Tip #1 Don’t skimp on your ice cream! The ice cream is the main character so make sure to choose the highest quality available. It’s also better to go with a full fat flavor, as well. This will ensure you get a thick and creamy texture.

But I’m not the milkshake police!! You can use a low-fat flavor or even frozen yogurt, just know that the end product is going to be thinner.

Tip #2 Use full-fat milk. Just like with the ice cream, a lower fat milk is going to create a thinner consistency. A lower fat milk is also going to create more ice within the milkshake, as well.

Tip #3 Let your ice cream soften. Let me repeat that…soften, not melt. Set your ice cream on the counter for about 10 to 15 minutes before you make your milkshakes. Your blender will thank you for it.

Tip #4 Don’t be shy when it comes to topping off your milkshake. Whipped cream and cherry is so classic, but just about any ice cream topping will do. Try mixing it up with some fine espresso powder for your next coffee fix or make it a little boozy with some bourbon or rum. Get creative!

Tip #5 Don’t overblend. Be cautious not to overblend the milkshake, as this can lead to a thin and watery consistency. Blend just until all ingredients are combined and the shake is smooth.

What do you like on your milkshake??

$5 Milkshake Recipe

Thick and creamy basic milkshake. Start with recommended ratio of ice cream to milk and adjust for preferred thickness. Enjoy!
Prep Time 5 minutes
Servings 1 shake

Equipment

  • Blender

Ingredients
  

  • 2 cups ice cream
  • ½ cup milk any percentage

Instructions
 

  • In a blender, combine ice cream and milk.
  • Pour into glass. Top with whipped cream and cherry, if desired.
Keyword beverages, dessert, milkshake

The Best Banana Bread Recipe

sliced banana bread

This banana bread is so moist and fluffy. The streusel-nut topping makes it sweet enough to eat for dessert. It pairs well with a cup of coffee and can be eaten on its own or spread with butter or cream cheese. The natural moisture from the ripe bananas contributes to the bread’s soft and tender texture.

When making this recipe, there’s just a few things you want to remember…

Tip #1 You want to make sure you are using very ripe bananas. In fact, the riper the better. You can make your bananas ripen quicker by storing them in a paper bag or you can bake them with peels on in a 300 degree oven for about 20 minutes.

Tip #2 Another important thing to remember is to thoroughly mash your bananas before adding them into your other wet ingredients. Mashing them helps to incorporate the banana flavor throughout your bread.

Tip #3 Don’t overmix your dough. When adding your wet and dry ingredients together, it’s important to mix just until moistened. The dough will be lumpy, but if you’ve sifted your flour (which I recommend doing every time you’re baking), you shouldn’t have to worry about those pesky clumps. So don’t overmix. The more you mix, the more gluten develops which leads to a dense, rubbery loaf.

Tip #4 Wrap and store overnight before slicing. You never want to slice banana bread when it first comes out of the oven. After baking, allow pan to cool on a wire rack, then remove bread from pan. Cool completely on wire rack. Wrap in plastic wrap and let sit overnight. This will ensure clean, easy slicing.

Ready for another Fall inspired dessert?  Try this Double Layer Pumpkin Pie.

The Easiest Banana Bread

Banana Bread

Sarah Sexton
Classic Banana Bread with Streusel-Nut Topping
Prep Time 25 minutes
Cook Time 55 minutes
Course Bread
Servings 16 slices
Calories 215 kcal

Ingredients
  

  • 2 cups all-purpose flour
  • 1 ½ teaspoons baking powder
  • ½ teaspoon baking soda
  • ¼ teaspoon salt
  • teaspoon ground nutmeg
  • 2 eggs, beaten
  • 1 ½ cups mashed ripe banana about 5 medium
  • 1 cup sugar
  • ½ cup melted butter can use cooking oil or margerine
  • ¼ cup chopped walnuts

Streusel-Nut Topping

  • ¼ cup packed brown sugar
  • 3 tablespoons all-purpose flour
  • 2 tablespoons butter
  • cup chopped walnuts

Instructions
 

  • Streusel-Nut Topping: In a small bowl combine 1/4 cup packed brown sugar and 3 tablespoons of flour. Cut in 2 tablespoons of butter until mixture resembles coarse crumbs. Stir in 1/3 cup chopped walnuts and set aside.
    Mixing streusel-nut topping
  • Preheat oven to 350F. Grease bottom and sides of a 9x5x3-inch or two
    7 1/2x3 1/2x2-inch loaf pans and set aside.
  • In a large bowl, combine flour, baking powder, baking soda, salt, cinnamon, and nutmeg. Make a well in the center and set aside.
    Making a well in flour mixture
  • In a medium bowl, combine eggs, bananas, sugar, and oil. Add egg mixture all at once to flour mixture. Stir just until moistened (Don't overmix).
    lumpy batter in mixing bowl
  • Fold in walnuts. Spoon batter into prepared pans. Sprinkle Streusel-Nut Topping over batter in pan(s).
    Banana Bread before baking
  • If you are using a 9x5x3-inch pan, bake for 55 minutes to 1 hour. Bake about 40 to 45 minutes for two loaf pans.
  • Cool in pan on wire rack for 10 minutes, then remove from pan and cool completely. Wrap and store overnight before slicing.
    Banana Bread after baking
Keyword Banana, banana cake, bread, breakfast, sweet bread